
Equimat Installation
Say Goodbye to Expensive Installation Charges!
With Equimats, there's no need for costly horse stall mat installation fees. Our unique design and formulation—compact, lightweight, and durable—make it easy for you to install these mats yourself. They can be easily cut to fit your space, providing a practical and economical flooring solution for your barn or facility.
INSTALLATION GUIDE
STEP 1: Measure the area of the mat installation.
How many rubber stall mats do I need?
Depends on your stall size. Average stall sizes are listed below.
Stall Size Number of Mats Cost*
10x10 9 $1,260
10x12 10 $1,400
12x12 12 $1,680
12x14 14 $1,960
Don’t see your stall size? Let us help, contact us today.

Click mats into desired configuration to suit area utilizing the interlocking edges.
See common stall size configurations in Installation FAQ

STEP 2: Place Mats in Desired Configuration
If you desire a straight edge or are customizing to go around protrusions, measure and mark cutting line with pencil or by light scoring line with knife.
STEP 3: Mark to Cut

Use a SHARP hardware knife cut off piece with locks to make a straight edge (don’t discard this piece – see #5 below). Follow same procedure if you have a protruding post or require a custom shape.
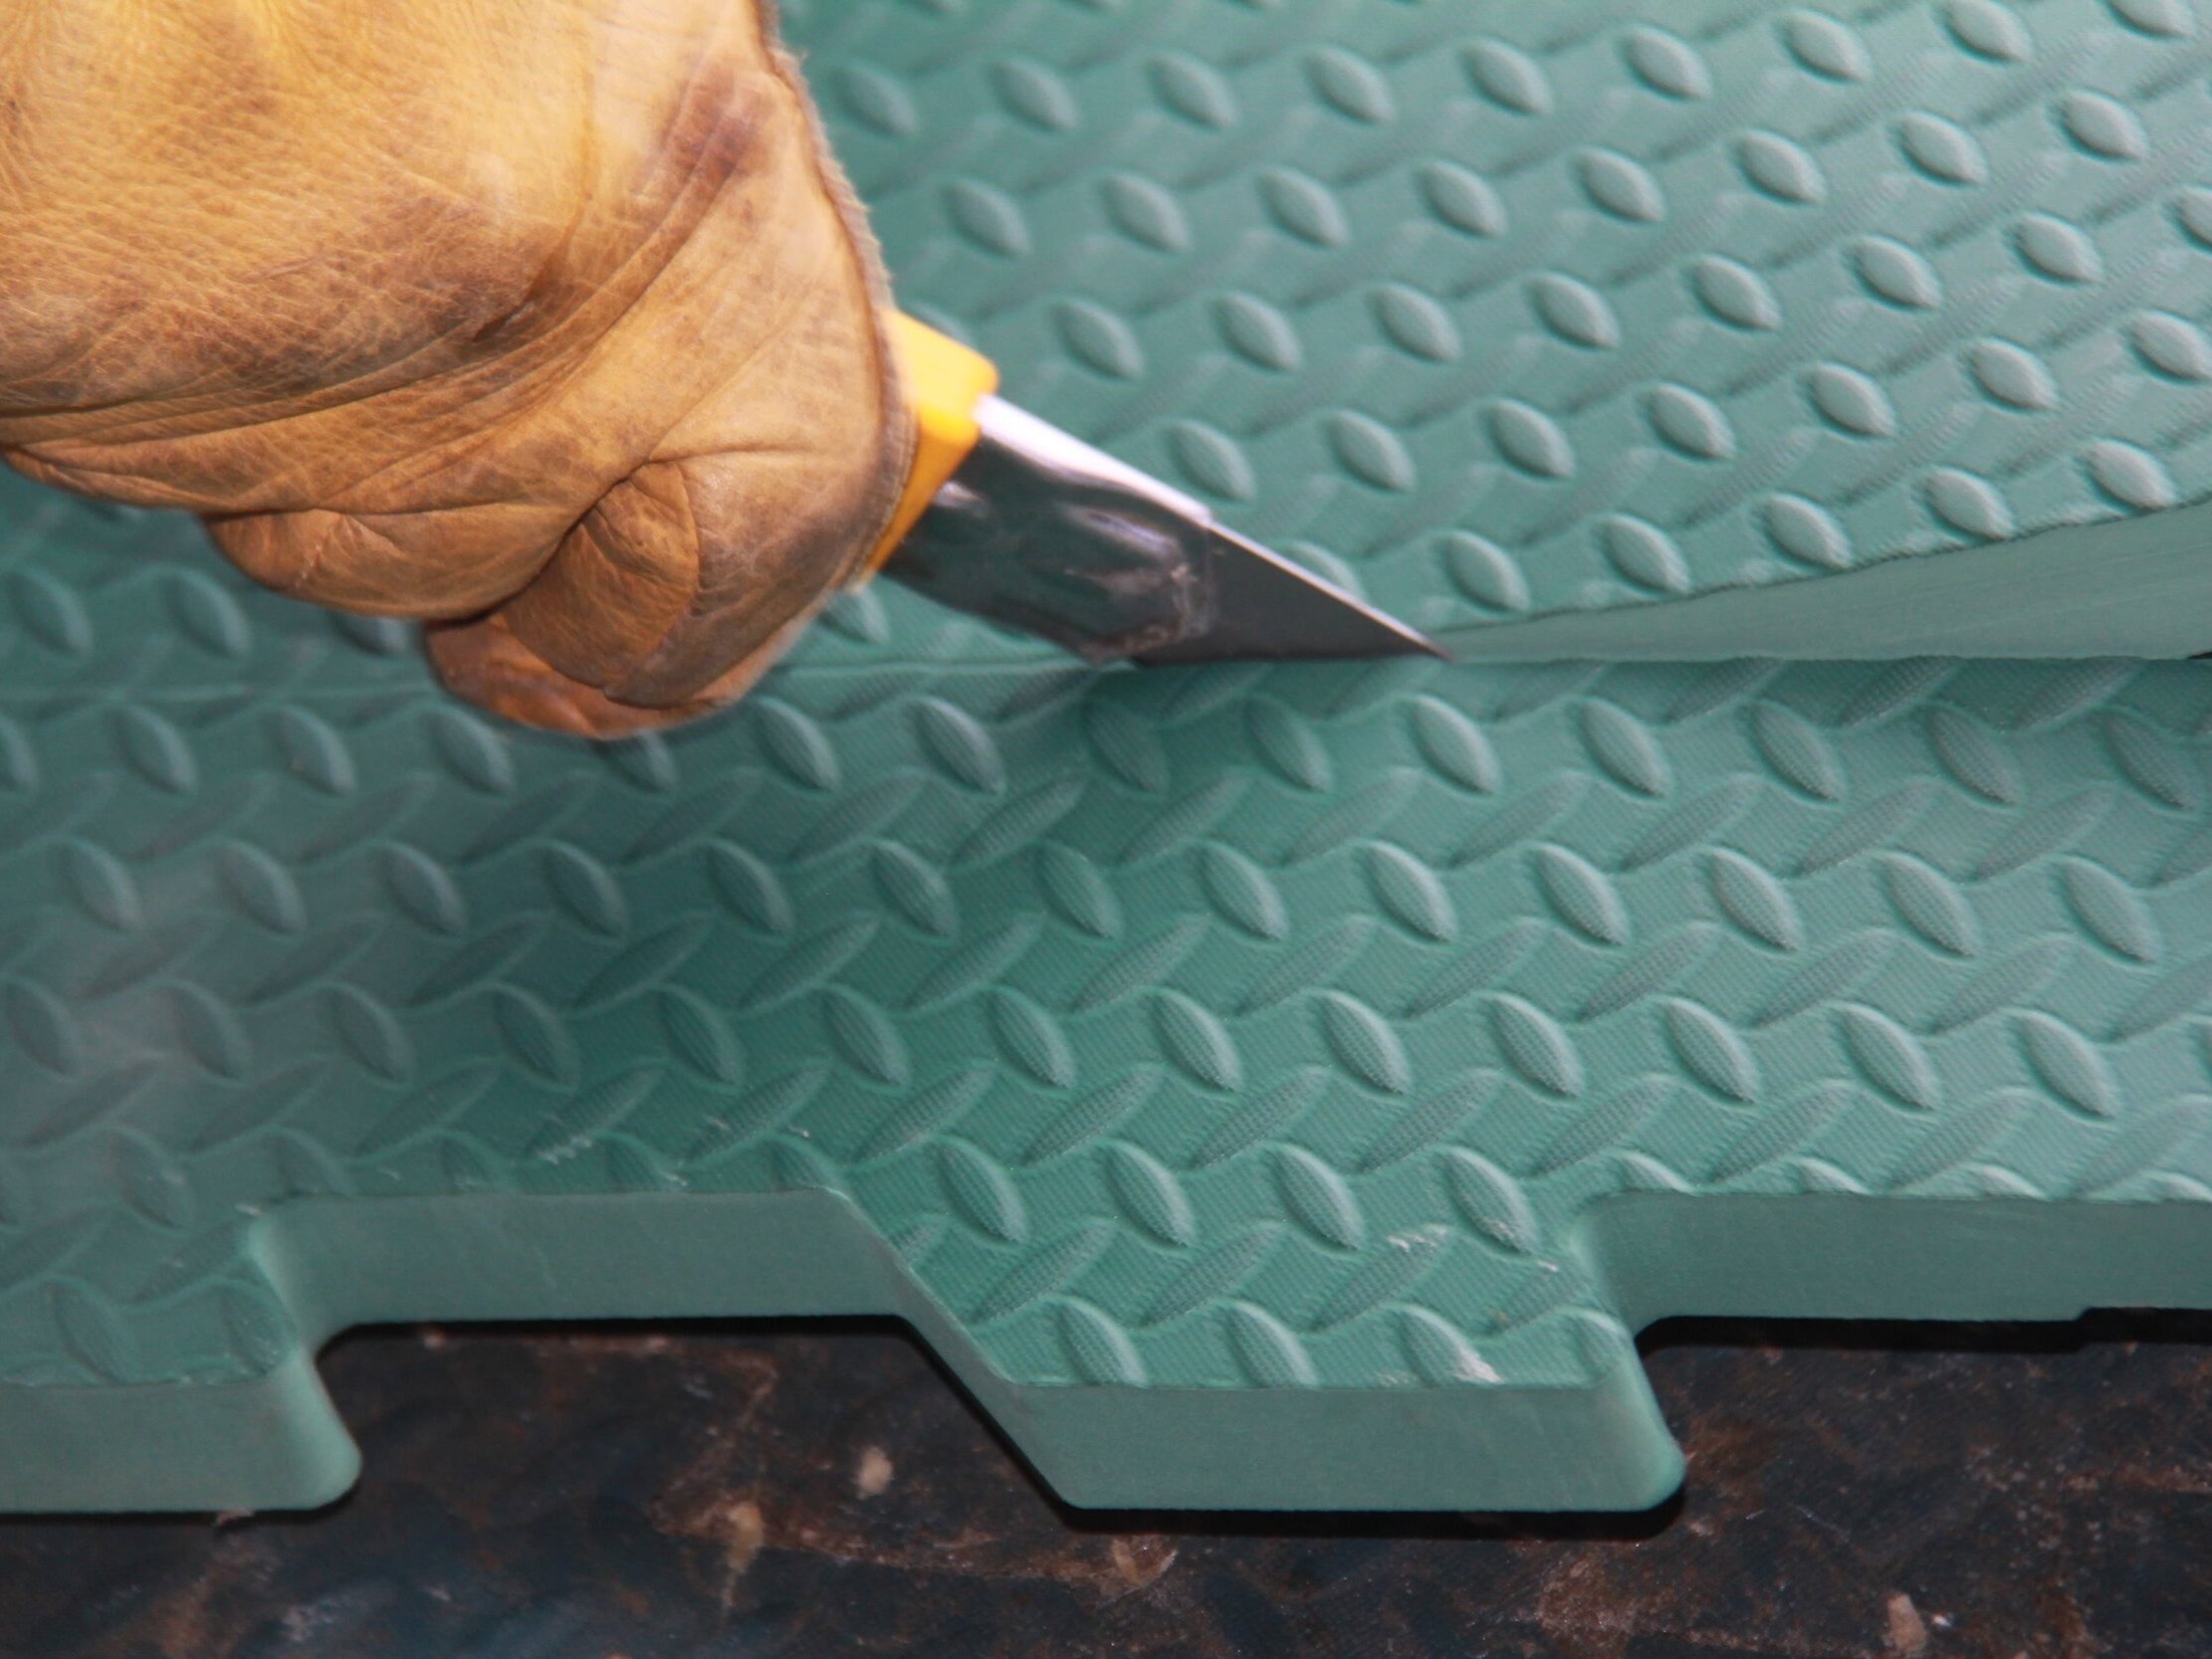
STEP 4: Cut
*Optional: For wall to wall flush straight edges use the cut piece from #4 and click locks onto the opposite side of your mats space, creating a straight edge on both sides.
STEP 5: Clean Finish

Installation Tips:
If you experience “drag” change your blade or make several strokes to gradually deepen the cut until removed.
If you have an area requiring many custom cuts, consider making a paper template and placing it in the area until you have the area covered you desire.
Cutting off locks is optional. For show or temporary horse stall mat use, keep locks on for possibly adding Ultimats to cover different areas.
DON’T discard offcuts. Equimats are incredibly durable. Many customers have re-fit several times.
If you take your stall mats up for any reason or re-install them in another horse stall, we suggest you mark the order number for the best re-installation fit.
Equimats provide a therapeutic, anti-fatigue floor that is now your horses bed. Use minimal bedding (shavings, straw, etc) – only necessary to absorb urine, not for bedding comfort. Pick droppings off the mat with a plastic shaving fork or shovel and remove saturated bedding & sweep clean. Done in minutes.
We recommend leaving a one to two-inch gap around the outside edge of your installed mats to allow for expansion. Once in place, the formulation of rubber and EVA (like foam in your running shoe) and the pressure of your horse walking on them will cause a slight expansion or “relaxing”. This is intentional as the interlocking pieces make a tighter seal and the entire installation expands 1-2 inches The suggested gap around the outside is to allow for this. If your mats are installed to fit snugly from wall to wall and then expand slightly causing a slight lift or bulge in the stall flooring, THIS IS EASILY FIXED! Simply use a sharp hardware knife to trim your Equimats edges along one side to the point where the stall mat flooring once again lies flat.
Further questions? See our FAQ Page or Contact Us!